The definitive Vim guide. Want to learn Vim? Start here.
Translated from the Portuguese original.Read the original
In this article
Coworkers often ask me how I learned Vim and how to start learning it, and the goal of this article is to demystify this famous text editor a bit and give people resources so they can finally lose their fear and give it a try.
So what is Vim, anyway?
Vim (short for Vi IMproved) is a copy, with additions, of the Unix text editor vi, which was created by Bill Joy.
Originally written by Bram Moolenaar, Vim was based on the code of the Stevie editor made for the Amiga, and its first version came out in 1991.
Vim is a free and open source text editor, and its license includes clauses that encourage people who like the software to consider donating money to children in Uganda.
Differences between Vi and Vim
Vim is backward compatible with Vi, and moving from Vi to Vim is very simple: you keep every feature Vi offers and gain many more. Below are some of the main differences, but if you want to read the full feature list, open the help with the command :help vi_diff (don't worry, we'll learn how to use commands in Vim soon).
Main improvements:
-
unlimited undo: you can undo every command you've used, with no limit.
-
portability: Vi is only available for Unix systems, while Vim runs on Windows, Mac OS, all Unix systems, and more.
-
syntax highlighting: Vim can be set up to highlight parts of the buffer (don't worry, we'll learn about the buffer later) in different colors and styles, based on the type of file being edited.
-
Vi compatibility mode: You can force Vim to behave like vi. However, all the improvements that make it compatible with Vi are turned off and you'll have an editor that is 100% compatible with Vi.
How to learn Vim?
The best way I found to finally learn Vim was to lose my fear of using it and try it during a few periods of my day.
Vim is not an easy text editor to learn and get productive with. There's a learning curve (Figure 1) that looks more like a wall, but once you climb that wall and start coming down the other side, you probably won't be able to use any other text editor.
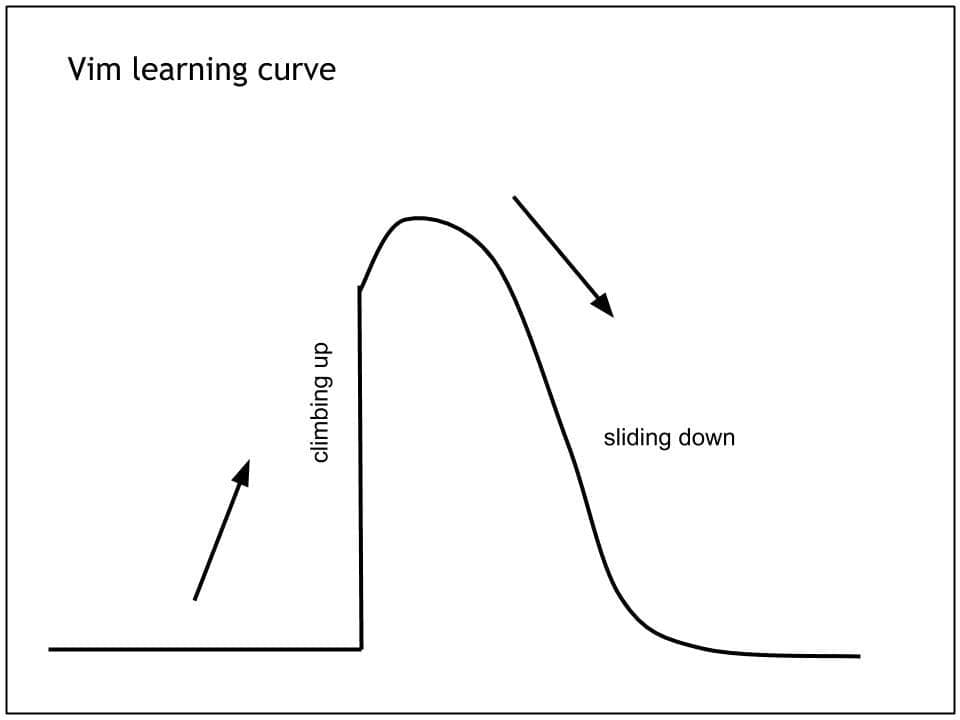
Figure 1: Vim Learning Curve: Courtesy: https://pascalprecht.github.io/posts/why-i-use-vim/
The approach I took to finally start learning Vim was, at certain times of the day (for an hour, for example), to stop using my default editor and keep doing the task I was working on in Vim.
Over time, as I customized it and installed new plug-ins, I started to become more productive with Vim than with other editors. Over time you also build muscle memory and Vim commands start to feel more natural.
Another approach is to add Vim Mode to your favorite text editor. Editors like Atom and VSCode already have community plug-ins that emulate Vim inside them.
Getting started (skip this section if you already have it installed)
Installation
Linux
Open your terminal and type the following commands:
sudo apt-get update
sudo apt-get install vim
MacOS
To install the latest version, use homebrew:
brew install vim
Using it
Right after installing, you can run the command vim nomedoarquivo.extensão and the chosen file will open in Vim.
Basic Movements
The first thing I recommend you do is run the command vimtutor pt (if you want the English version, just type vimtutor) in your terminal.
A screen will open with a tutorial of about 30 minutes that teaches Vim's basic movements. Before going on with the article, I recommend you read all the tutorial's instructions carefully. When you finish it, you'll know the basics of Vim.
Essential Concepts
Buffers
Buffers in Vim are nothing more than editable files that are available in memory. When you open a file with Vim, you're creating, and therefore working in, a buffer.
Buffers are easier to explain in practice, so let's go:
Create any folder:
$ mkdir brincando_com_buffers && cd brincando_com_buffers
Now create two files:
$ echo 'Vim Rocks!' > vimrocks.txt
$ echo 'In Love With Buffers!' > inlove.txt
Now open the first file with Vim:
$ vim vimrocks.txt
At this point you're already using a Vim buffer \o/
Now let's open another file from inside Vim using the command :badd or : bad:
:badd inlove.txt
Now you'll have two buffers in Vim. To list the buffers, use the command :ls:

Figure 2: Vim Buffers
The :ls command returns information about each buffer, such as: each buffer's unique identifier, buffer indicators (described below), the file name, and the line number of your current position in the current buffer.
Indicators:
%: buffer in the current window
#: alternate buffer, can be reached with the CTRL-6 keys
a: active buffer, loaded and visible
h: hidden buffer, loaded but not visible
-: buffer that can't be modified
=: read-only buffer
+: buffer that has been modified successfully
x: buffer with read errors
: if the buffer has no indicator, it hasn't been loaded yet
Some Buffer commands:
:bp - Switches to the previous buffer
:b2 - Switches to buffer number 2
:bn - Switches to the next buffer
:ball - Opens all buffers in one window
:brew - Opens the first buffer in the list
:bd - Deletes the current buffer
:bd 2 3 - Deletes buffers number 2 and 3
Note: All of these commands can be remapped to commands of your choice (I'll explain later).
Customizing your Vim (the .vimrc file and its settings)
Vim is a flexible editor that can be customized to your text editing style. One of the first things you should learn is to create and maintain a ~/.vimrc file that will hold all your favorite settings, keyboard shortcuts, custom commands, and even plug-in extensions (more on that later).
The .vimrc is a file written in a programming language called vimscript. So your .vimrc can contain variables, conditionals, function definitions, and so on.
If you don't have this file yet, you should create it in your user's home folder. In my case it's at /Users/adrianolisboa/.vimrc.
Let's use the VimConfig site to generate a basic configuration. Open the site and check or uncheck the options you want. If you don't understand what those options mean yet, just open your newly created .vimrc and paste the settings that show up in the input on the right side of the site.
Example of a configuration generated by the site:
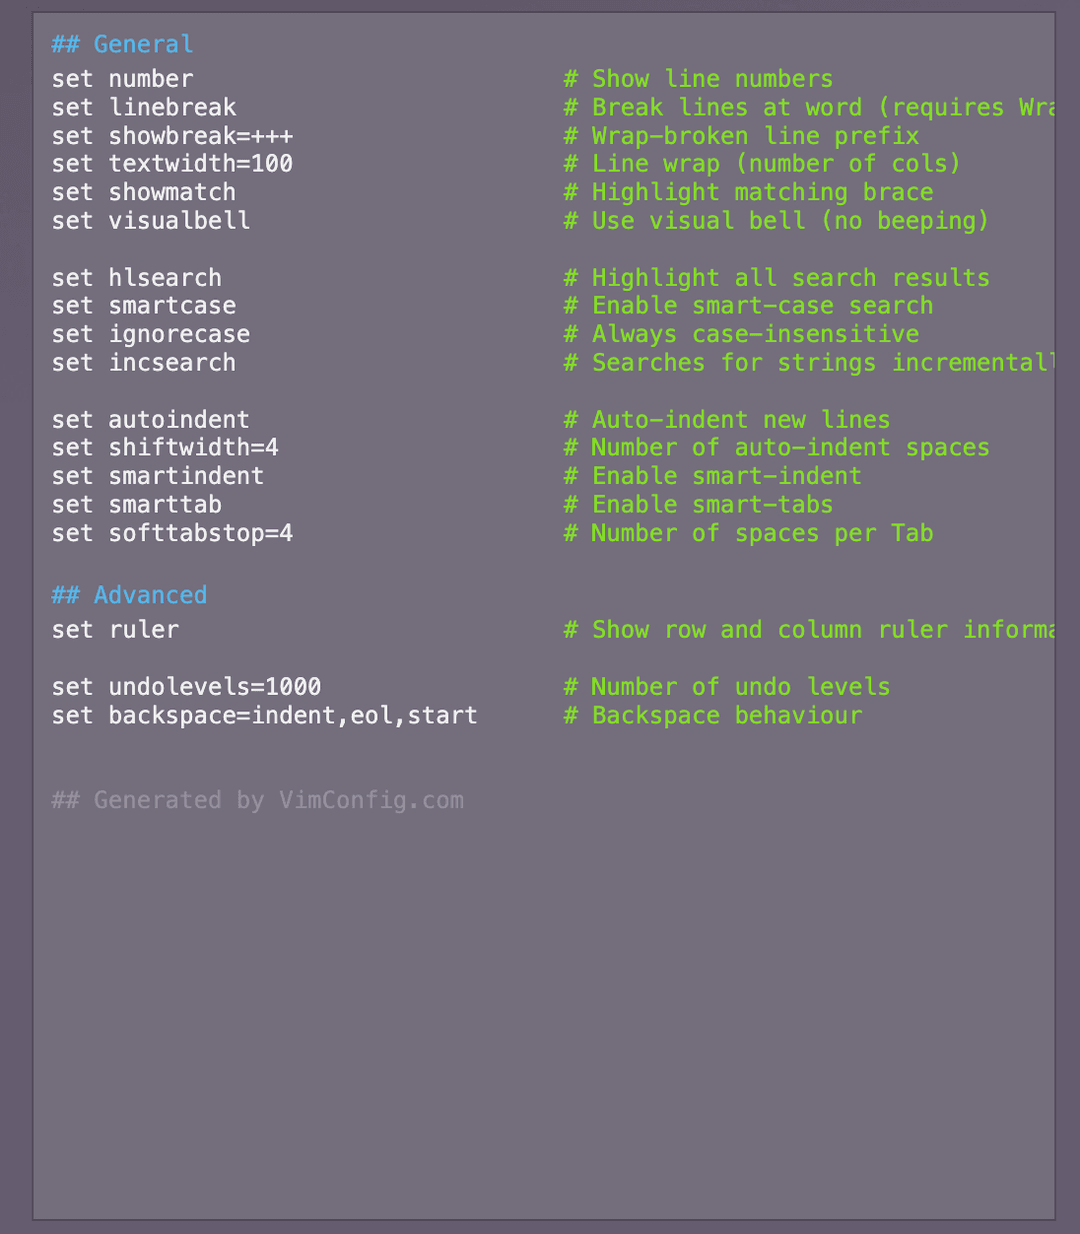
Figure 3: Example .vimrc configuration
If you want to learn a bit more about vimscript, there's the book Learn Vimscript the Hard Way (in English), which you can read on the site or buy in digital formats for $8 on Leanpub.
Other people's configurations
A mistake many developers make when they start using Vim as their default editor is downloading another developer's configuration. In the end you'll end up with a Vim full of plug-ins and settings you'll probably never use (this happened to me).
If you really want to learn Vim from basic to advanced, start by creating your own .vimrc and, as you start missing settings your old editor had, add them.
In the previous topic we generated a .vimrc file with basic settings using the VimConfig site. I recommend you spend some time reading the generated settings and trying to understand what they mean (most of them have a comment in English next to them). It's also worth removing them one by one and seeing which behaviors disappear from the editor.
For reference, here's my vimrc :-)
Plug-ins
One of the things that makes Vim as extensible as it is, is installing plug-ins, which are customizations that add new features to your Vim. One example of a famous plug-in is Nerdtree, which adds a file tree to your Vim:

Figure 4: Nerdtree plug-in installed and open
Plug-in managers
Before we list some plug-ins, we need to talk about how to install them. For that there are several plug-in managers made by Vim users, and in the end they all do the same job: Install plug-ins :P
Below is a list of the best known ones, feel free to pick one.
The step by step for adding each one is at its link.
Personally, I've been using minpac for a while, and I picked it because it has a minimalist philosophy and uses Vim 8 features.
Over time you may start missing features your default text editor had that you can't find in Vim. That's the time to search Google for plug-ins. In most cases there will already be one that meets your need, made by some user.
Recommended plug-ins
I'll list some of the plug-ins I missed when I fully moved away from my old text editor, Atom. The idea is for this list to serve only as a reference, and for you to add plug-ins as you start missing them.
- nerdtree - Adds a file tree that makes it easier to navigate project structure.
- ctrlp.vim - File finder (just press Ctrl + P and type what you're looking for).
- syntastic - Checks for syntax problems in the code.
- vim-arline - Adds a status bar with lots of useful information about your current session.
- vim-buffergator - Plug-in for listing, navigating between, and selecting buffers for editing.
- vim-fugitive - Git wrapper for Vim (adds git functions to your Vim).
- identLine - Adds vertical lines so you can see your code's indentation better.
- vim-hardtime - Helps you build good editing habits with vim;
For reference, this is the file where I keep all the plug-ins I'm using right now.
The VimAwesome site has a list of plug-ins sorted by how many people use them, it's worth a look.
Conclusion
With the information above you already have everything you need to start using some of Vim's features. Since it's a very customizable and dynamic editor, you'll always be learning new commands, how to automate others, and even discovering new plug-ins as they come out. If you have any questions, be sure to leave a comment below :)
Learning more (from beginner to advanced)
Tutorials (from basic to advanced)
- Vim Golf has a series of challenges you can use to learn and practice Vim.
- vimcasts this site has a big list of short screencasts that will help you learn something new.
- Vim Videos by Derek Wyatt - videos from basic to advanced.
- Upcase - has a few free courses on vim.
Extra resources
-
Article by the creator of Vim explaining seven habits of effective text editing.
-
Threads about Vim on CoderWall.
-
Add the video tutorials from basic to advanced
References
https://en.wikipedia.org/wiki/Vim_(text_editor)